To develop a android app that require data to store in server , we need to have server and database in the server. So is there any possibility that I can use Google Sheet as DB and use it in Android app?
Yes…! We can use it … here I am presenting series of tutorial on using Google Sheet As Database in web and Android Apps. Please understand the along with flow. Lets start
or
Open this link in your phone browser – http://bit.ly/2wyBjS7
Demo Sheet Url – http://bit.ly/2ZbVly5
1.Android Part :
Step 1 : Create new Project ,
- Make sure you are using latest version of android studio.
- Make sure you are connected to internet.
- In app level gradle file check for sdk version you want to use.. sometimes latest version may give some error so, try suing previous if latest creates any issues.
Step 2 : Create add_item.xml file and below code. Here for demonstration I am using 2 Edit text and 1 Button. Make sure you use same ID of elements in the AddItem class.
<?xml version="1.0" encoding="utf-8"?>
<android.support.constraint.ConstraintLayout xmlns:android="http://schemas.android.com/apk/res/android"
    xmlns:app="http://schemas.android.com/apk/res-auto"
    xmlns:tools="http://schemas.android.com/tools"
    android:layout_width="match_parent"
    android:layout_height="match_parent">

    <TextView
        android:id="@+id/textView"
        android:layout_width="wrap_content"
        android:layout_height="wrap_content"
        android:layout_marginStart="16dp"
        android:layout_marginTop="16dp"
        android:text="Item Name"
        app:layout_constraintStart_toStartOf="parent"
        app:layout_constraintTop_toTopOf="parent" />

    <TextView
        android:id="@+id/textView2"
        android:layout_width="wrap_content"
        android:layout_height="wrap_content"
        android:layout_marginBottom="18dp"
        android:layout_marginStart="16dp"
        android:text="Brand"
        app:layout_constraintBottom_toTopOf="@+id/et_brand"
        app:layout_constraintStart_toStartOf="parent" />

    <EditText
        android:id="@+id/et_item_name"
        android:layout_width="0dp"
        android:layout_height="wrap_content"
        android:layout_marginBottom="50dp"
        android:layout_marginEnd="10dp"
        android:layout_marginStart="10dp"
        android:layout_marginTop="54dp"
        android:ems="10"
        android:inputType="textPersonName"
        app:layout_constraintBottom_toBottomOf="@+id/textView2"
        app:layout_constraintEnd_toEndOf="parent"
        app:layout_constraintStart_toStartOf="parent"
        app:layout_constraintTop_toTopOf="parent" />

    <EditText
        android:id="@+id/et_brand"
        android:layout_width="0dp"
        android:layout_height="wrap_content"
        android:layout_marginEnd="10dp"
        android:layout_marginStart="10dp"
        android:layout_marginTop="168dp"
        android:ems="10"
        android:inputType="textPersonName"
        app:layout_constraintEnd_toEndOf="parent"
        app:layout_constraintStart_toStartOf="parent"
        app:layout_constraintTop_toTopOf="parent" />

    <Button
        android:id="@+id/btn_add_item"
        android:layout_width="wrap_content"
        android:layout_height="wrap_content"
        android:layout_marginTop="49dp"
        android:text="Add Item"
        app:layout_constraintEnd_toEndOf="parent"
        app:layout_constraintStart_toStartOf="parent"
        app:layout_constraintTop_toBottomOf="@+id/et_brand" />
</android.support.constraint.ConstraintLayout>
Step 3 : Add Volley Library in the gradle dependency. This is used to handle HTTP REST requests between client – server. Here in our case Android App and Google App script . Find more details on Volley library here https://developer.android.com/training/volley/
implementation 'com.android.volley:volley:1.0.0'
It should look like this in buid.gradle file
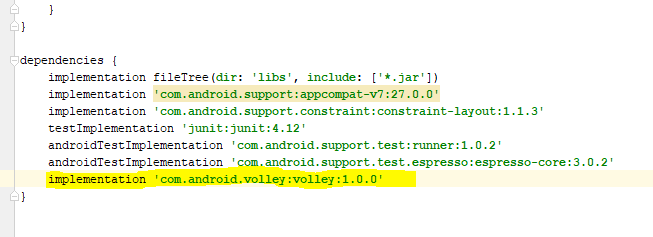
Once Added, SYNC gradle files.
Step 4: create AddItem.java file. Here on click ButtonAddItem , I am calling addItemsToSheet() functions, which takes inputs from Edit text and pass it as parameters along with HTTP Post request that we are sending to web app that we create in Step 9. Don’t forget to change web app url in stringRequest object(Highlighted in code)
package com.ccc.gsheetitem;

import android.app.ProgressDialog;
import android.content.Intent;
import android.os.Bundle;
import android.support.annotation.Nullable;
import android.support.v7.app.AppCompatActivity;
import android.view.View;
import android.widget.Button;
import android.widget.EditText;
import android.widget.Toast;

import com.android.volley.AuthFailureError;
import com.android.volley.DefaultRetryPolicy;
import com.android.volley.Request;
import com.android.volley.RequestQueue;
import com.android.volley.Response;
import com.android.volley.RetryPolicy;
import com.android.volley.VolleyError;
import com.android.volley.toolbox.StringRequest;
import com.android.volley.toolbox.Volley;

import java.util.HashMap;
import java.util.Map;

public class AddItem extends AppCompatActivity implements View.OnClickListener {


    EditText editTextItemName,editTextBrand;
    Button buttonAddItem;
    @Override
    protected void onCreate(@Nullable Bundle savedInstanceState) {
        super.onCreate(savedInstanceState);

        setContentView(R.layout.add_item);

        editTextItemName = (EditText)findViewById(R.id.et_item_name);
        editTextBrand = (EditText)findViewById(R.id.et_brand);

        buttonAddItem = (Button)findViewById(R.id.btn_add_item);
        buttonAddItem.setOnClickListener(this);


    }

    //This is the part where data is transafeered from Your Android phone to Sheet by using HTTP Rest API calls

    private void   addItemToSheet() {

        final ProgressDialog loading = ProgressDialog.show(this,"Adding Item","Please wait");
        final String name = editTextItemName.getText().toString().trim();
        final String brand = editTextBrand.getText().toString().trim();


        StringRequest stringRequest = new StringRequest(Request.Method.POST, "Add Your Web App URL",
                new Response.Listener<String>() {
                    @Override
                    public void onResponse(String response) {

                        loading.dismiss();
                        Toast.makeText(AddItem.this,response,Toast.LENGTH_LONG).show();
                        Intent intent = new Intent(getApplicationContext(),MainActivity.class);
                        startActivity(intent);

                    }
                },
                new Response.ErrorListener() {
                    @Override
                    public void onErrorResponse(VolleyError error) {

                    }
                }
        ) {
            @Override
            protected Map<String, String> getParams() {
                Map<String, String> parmas = new HashMap<>();

                //here we pass params
                parmas.put("action","addItem");
                parmas.put("itemName",name);
                parmas.put("brand",brand);

                return parmas;
            }
        };

        int socketTimeOut = 50000;// u can change this .. here it is 50 seconds

        RetryPolicy retryPolicy = new DefaultRetryPolicy(socketTimeOut, 0, DefaultRetryPolicy.DEFAULT_BACKOFF_MULT);
        stringRequest.setRetryPolicy(retryPolicy);

        RequestQueue queue = Volley.newRequestQueue(this);

        queue.add(stringRequest);


    }


    @Override
    public void onClick(View v) {

        if(v==buttonAddItem){
            addItemToSheet();

            //Define what to do when button is clicked
        }
    }
}
Step 5: Add button in activity_home.xml for Demonsatrion
<?xml version="1.0" encoding="utf-8"?>
<android.support.constraint.ConstraintLayout xmlns:android="http://schemas.android.com/apk/res/android"
    xmlns:app="http://schemas.android.com/apk/res-auto"
    xmlns:tools="http://schemas.android.com/tools"
    android:layout_width="match_parent"
    android:layout_height="match_parent"
    tools:context=".MainActivity">

    <Button
        android:id="@+id/btn_add_item"
        android:layout_width="wrap_content"
        android:layout_height="wrap_content"
        android:layout_marginEnd="130dp"
        android:layout_marginTop="194dp"
        android:text="Add Item"
        app:layout_constraintEnd_toEndOf="parent"
        app:layout_constraintTop_toTopOf="parent" />
</android.support.constraint.ConstraintLayout>
Step 6: Add following code in ActivityMain.java . Here on click Add Item Button , screen i.e Activity is navigated to AddItem class using Intent object.
package com.ccc.gsheetitem;

import android.content.Intent;
import android.support.v7.app.AppCompatActivity;
import android.os.Bundle;
import android.view.View;
import android.widget.Button;

public class MainActivity extends AppCompatActivity implements View.OnClickListener {

    Button buttonAddItem;
    @Override
    protected void onCreate(Bundle savedInstanceState) {
        super.onCreate(savedInstanceState);
        setContentView(R.layout.activity_main);

        buttonAddItem = (Button)findViewById(R.id.btn_add_item);
        buttonAddItem.setOnClickListener(this);

    }

    @Override
    public void onClick(View v) {

        if(v==buttonAddItem){

            Intent intent = new Intent(getApplicationContext(),AddItem.class);
            startActivity(intent);
        }

    }
}
Step 7: Add AddItem.class and Internet permission to manifest.xml file
<?xml version="1.0" encoding="utf-8"?>
<manifest xmlns:android="http://schemas.android.com/apk/res/android"
    package="com.ccc.gsheetitemdemo2">

    <uses-permission android:name="android.permission.INTERNET"/>

    <application
        android:allowBackup="true"
        android:icon="@mipmap/ic_launcher"
        android:label="@string/app_name"
        android:roundIcon="@mipmap/ic_launcher_round"
        android:supportsRtl="true"
        android:theme="@style/AppTheme">
        <activity android:name=".MainActivity">
            <intent-filter>
                <action android:name="android.intent.action.MAIN" />

                <category android:name="android.intent.category.LAUNCHER" />
            </intent-filter>
        </activity>
        <activity android:name=".AddItem"/>
    </application>

</manifest>
2. Back End – AppScript Part
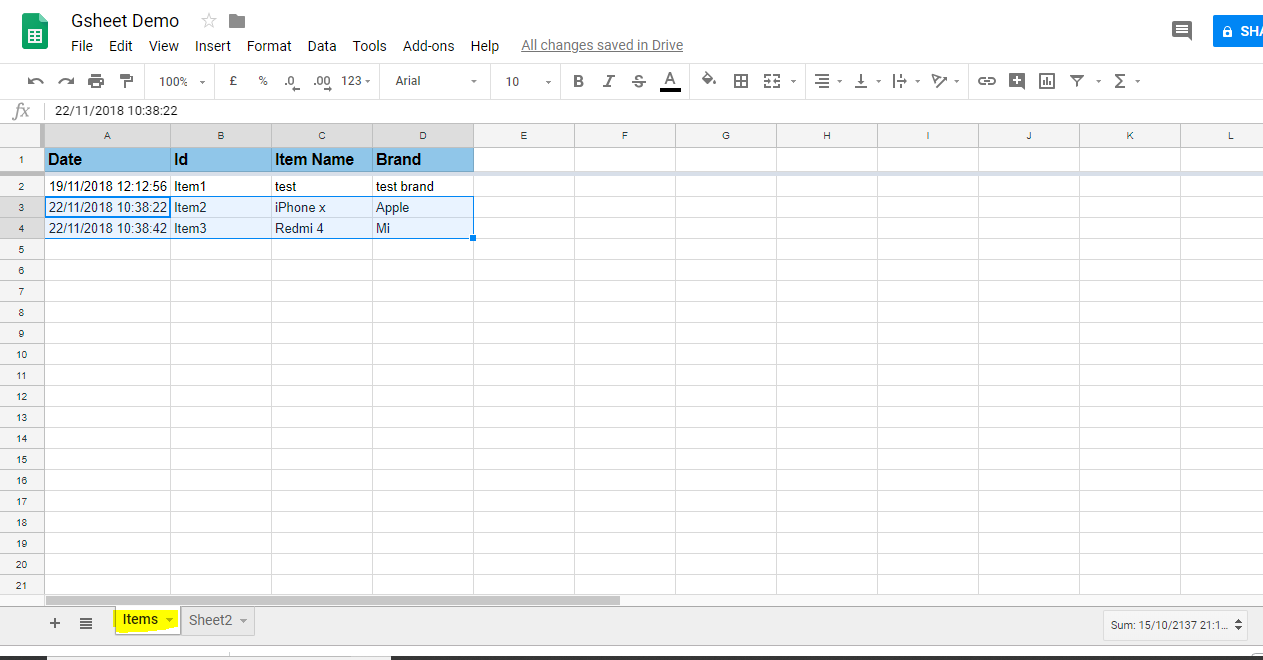
Step 8: Create new Spread Sheet and 4 columns.
Date, Id , Item Name , Brand
Change sheet name form Sheet1 to Items
Step 9: Create new AppScript and below code. Please understand the logic
- Change the Spread Sheet URL to your Spread Sheet URL that you created in step 8
- Make sure your parameters match with what ever you are sending from Android code.
Example e.parameter.brand should match with the params.put(“brand“,brand)
- Deploy as web App, make sure even anonymous user can access the web App
note : if you make any changes in the Appscript don’t update with the same version while deploying always use new version.
var ss = SpreadsheetApp.openByUrl("Add Your Spread Sheet URL here");

var sheet = ss.getSheetByName('Items'); // be very careful ... it is the sheet name .. so it should match


function doPost(e){
var action = e.parameter.action;

if(action == 'addItem'){
  return addItem(e);

}

}


function addItem(e){

var date =  new Date();

var id  =  "Item"+sheet.getLastRow(); // Item1

var itemName = e.parameter.itemName;

var brand = e.parameter.brand;

sheet.appendRow([date,id,itemName,brand]);

   return ContentService.createTextOutput("Success").setMimeType(ContentService.MimeType.TEXT);


}
Step 10 : Test it in Post man Tool. Once it works then , copy the web App URL and paste it in the URL – section used in step 4
Step11 : Run and test it in real device or emulator.